Pages

Sunday, September 30, 2012

Orange Strawberry Smoothie

Kids asking for a milkshake?  Here's an alternative that is not only healthier but tastes amazing. 

My personal recipe for an Orange Strawberry Smoothie


Ingredients:  1 cup        Sliced Frozen Strawberries
                       1/2 cup     2% Milk
                       1/2 tsp      Pure Vanilla Extract
                       1/4 cup     Sugar
                       Orange Sherbet

Combine Strawberries, Milk, Vanilla, and Sugar in blender.  Fill remainder of blender with Orange Sherbet.  Blend thoroughly.  Makes about 3 cups

 
End result = Happy Kids

Monday, September 24, 2012

Twig Wall Art / Jewlery Display

As anyone that knows me is aware I have a bit of an obession with Trees.  My favorite is the Willow but I love trees of any variety.  From the way they bloom in the spring, the fullness of leaves and flowers in summer, the colorfulness of fall and even the bare branches of winter.  Because of this love I decided to make a display piece out of twigs.  This piece can be used as wall art or for organizing and displaying jewlery.  It could also be put into a base and set upon a shelf or dresser.  Hope you enjoy the new piece.


Here is the completed piece as wall art.  Place in the middle of exsiting pictures to add character.

Start by collecting twigs.  Make sure that they are not too thin, the thinner they are the harder it is to prevent breakage.


Remove the bark using a utility knife or razor blade. 
Note: I used a utitlity knife for the stalk and a razor blade for tight spaces.
Removing bark is optional, but keeps jewlery clean from debris.


Once bark is removed, Sand to remove sharp edges and smooth.


Paint or Stain individual pieces.  I chose to use a clear spray paint.


Next use wire to connect the twigs to eachother.  I also put a dab of glue between the wire and twig for extra hold.

 You can use crafting wire, but I chose to take wire from an old decorative piece that I no longer use.


I just removed pieces with enough length and that I thought would go with my piece.


Then I removed leaves from the wires so I would just have the base wire.


This is the piece with all the twigs connected.  Allow plenty of dry time for your glue to set.


I then added some leafy pieces from my old decoration to add a little flavor.
You may add any type of extra decoration to the piece, or keep it basic without extras.


Here is the piece with jewelry.  You can place necklaces, braclets, watches, rings & earrings on it.


To hang the piece I used a wall hook and fishing line.  I just tied a short length of fishing line to the piece behind one of my leafy decoritive spots, then I tied the other end to the wall hook. 

Adjust the length so that the piece will hang close to the wall or angle away from the wall a bit.

This piece was fun but it was fairly time comsuming.  The longest part is striping the bark.  I spent a week working on it, but the time I spent was spaced out to include time for regular household chores, family time, and other projects.  In all I spent around 1 to 2 hours a day working on it. 


Tuesday, September 18, 2012

Potty Training

Cole my 2 year old son has been showing some signs of being ready to start the potty training process.  Cole being my 3rd child I realize that this can be a very lengthy process. 

Some people claim to have the perfect system to have your child potty trained within a matter of days.  I for one think this is belloni.  From what I've read and heard of these systems it is more the parent that has been trained to take the child to the restroom at prescribed times.  Although this may be effective on some levels it is simply not going to work all the time.  Image a long commute to Grandma's house or some other destination.  There simply isn't always a way to make sure there's an available restroom.  I have learned it takes time, paitence, and motivation on the part of your child to be successful in potty training. 

Here are a few of my thoughts, insights, and tips on Potty Training your child.
  • Older children are easier to potty train, since they are able to communicate thier need, also their bodies have become more developed and are able to hold it longer.
  • Children that stay dry through the night are better canidates for potty training.
  • Don't push your child.  Incourage your child but don't get upset if they have an acident (even if it is on your freshly cleaned floor)
  • Avoid soiled clothes, furniture, and floors by using one of the many products on the market disigned for potty taining. Such as pull-ups (off brands work great too), training underwear (these will have leaks and are less than convenient if your child goes #2), or you can continue to use diapers (you get more for your money).
  • You can start potty training at any age, but expect it to take time no matter what age your child is.
  • Use a potty training seat.  Different children prefer different potty training toilets.  There is a variety to choose from these include seats that hook onto a regular sized toilet, and stools that you have to clean.  Some children prefer to use the big toilet like everyone else.
  • Take your child to the restroom with you.  For some this may be odd at first but children learn from example.  If they see you do it they are more likely to want follow suit. 
  • Never forget to make a big deal out of it. They become more encouraged and excited about the transition that way.  You can even praise yourself for going when your child is with you, it helps your child to realize it is a good thing, and want to do the same.
  • It's ok to train your boys to sit down.  This helps prevent a wet floor and seat, also eliminates something else they have to remember (lifting the seat can be hard for boys of all ages).
The list can go on and on but really all you need is to listen to your child and encourage him/her.

As I said we are now working on potty training Cole.  He turned 2 the end of July so is still on the young side of potty training.  My oldest son didn't show much interest in potty training until he was months away from 3 but once he started it was a very smooth and easy progression.  My daughter was over 3 when she was completely potty trained.  She showed some interest but it wasn't until after the baby was born that she decided to use the toilet all the time. 

With all of my children they showed an interest in using the toilet before they ever actually did.  That has meant lots of trips to the toilet without any result, but I've just considered it a step in the right direction.  Today was the first day Cole successfully used the toilet.  I expect it to be a long road to completion but I'm excited that he is ready to start this journey. 

Here's a picture of my little big boy.

Monday, September 17, 2012

"Man Cave' Sign

So today I made a sign for Jeremy to hang outside his "Man Cave". I haven't given it to him so I'm very excited for him to see it when he gets home. I'm sure he's gonna love it. I'll show you the finished product then how I made it.


I used an old weathered board, various empty beer cans, twine, paint and stapes.
I started by writing what I wanted to say in pencil, then used Acrylic paints and painted the words.
Then I traced the words with a flat brush to highlight each letter for better visibility.
Once I was done I coated with a clear spray paint to protect against weathering.
I then stapled twine on the bottom edge of my board.
I also stapled a piece of twine on the back at the top for hanging.
After this I tied a can to the end of each string.
Presto. Fun and Easy sign. Just use soda cans and change the words for non-drinkers.

Friday, September 14, 2012

New Addition

Today I added a new page called Spiritual Growth.  I want to use that page to share the things going on in my life in relation to my walk with Christ.  I hope you enjoy.  I plan on adding more pages so that I can keep things more specific per page.  Being a new blogger I'm still in the learning process of how to make my page flow and have the best potential.  I'd love any feed back and advice any of you blogger veterans can offer.  Thanks to all of my followers that are helping support and spread my blog to others.  I really am hoping to share information, advice, help and quality resources in all the topics of my blog. 

Thursday, September 13, 2012

Chili kinda day

Looks like the seasons are a changin'.  Personally I Love Fall.  I love the crispness of the air, the colors of the trees, hayrack rides, hot coco, warm soups, and all the festivites.  Today along with the chill it has been rainy.  That being said it's been an indoor kind of day.  It's not quite time for the heat to be turned on but I think this will be a great day to use the fireplace for the first time this year.  Also thinking chili is a great idea for dinner. 

Being a stay at home mother of 3 I've spent my day cleaning up the aftermath of my children's adventures and in my spare time cuddled up on the couch with a cozy blanket and a good book.  At the moment I'm reading BLOOD LINE by James Rollins.  Picked it up from the library on Monday and looks like I'll be finished with it by the time bed calls this evening.  I've also been considering some new projects to work on for this chaning of season.  I'll be posting the progress of these projects later as they come along.

I got this picture from one of my facebook friends Modern Pioneer.  Great pic.

Monday, September 10, 2012

Starting a Cross-Stitch

Here are the steps you will need to take to start working on a new Cross-Stitch Pattern.  I hope you find them helpful.

Step 1: First you should tape off the edges of your canvas.  You do this so that the edges do not frey, this will prevent you from losing space that you may want later when you frame.  Note: This is a good time to also seperate you string into separte colors if you purchased a kit.  I suggest using a color wheel that is numbered so that you can keep track of what each color is.  These can be purchased or you can make one at home with a piece of stiff paper or cardboard.  Just punch holes into it and number them.  Then number the colors on your color sheet so that you know which color goes with each number.


Step 2: Next you will want to find the middle of your canvas.  You will use this as your starting area.  To find the middle fold your canvas in half then fold in half the other way.  Place your neddle in the hole closet to the middle fold.


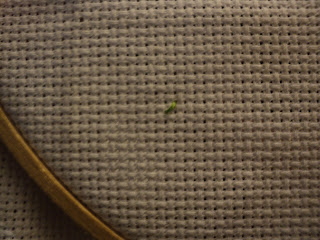
Step 3: Place your canvas inside of your stitching ring (Ring is optional but for beginners it is helpful). Note: Rings come in various sizes so make sure to pick one that gives you plenty of room to stitch but is not too big for your canvas.
As you tighten the ring onto the cavas you will want to stretch your cavas so that it is not loose.  Note: Either keep your neddle in the middle hole or strecth it a little by wiggling your neddle around.  This will keep your place while you place your canvas in the ring. 


Step 4: Now you will want to pick a color to start your stitching.  I suggest picking a color that is close to the middle to avoid alot of counting in order to start.  Once you have picked your starting point string your needle. 


Step 5: Count over from your middle to where you want to start your first stitch.  Push your neddle up from the bottom, work diagonally and push needle down through your canvas.  Do this again in the opposite direction to make an x.  As you work your stitches make sure to work over the top of your excess string on the back of the canvas.  This will hold it in place so that you don't have loose ends.  Also when you reach the end of a string work the rest through part of your stitching on the back to tie off.  This makes it so that you don't have to worry about knots.  Note: Make sure that your stitches are lapped in the same direction for all of your x's. 


Step 6: Follow your pattern and place all your stitches for this color.  You may need to move your ring around to access all the areas where you will use your first color.  Once you complete one section of your color simply look at your pattern to find another section using the same color and count boxes over to that section.  Then count that many squares on your canvas and start your stitches there. 

Here is my first completed color.  Note: As you work you will have rings and lines on your canvas but when you have completely finished you can iron and/or stretch your canvas to remove the creases for framing.


Thursday, September 6, 2012

Handkerchief

Hand Stitched Silk Handkerchief's


Close up of Flowers


Close up of other Flowers

Doilies

These Doilies were made by my Grandmother
she passed away the night before my youngest Son
was born.  Two years ago now but alway in my heart.
 

Large Hand-Made Doilie


Large & Small Doilie's


COMPLETED CROSS-STITCH PATTERNS

Cross-Stitch Patterns I've done
 
 
Cross-Stitch I made for a friends baby
This was one of the first patterns I ever actually finished, so it is
a pretty special one to me.  Glad I could help out a friend
that is not proficient in cross-stitch.

 
Cross-Stitch I made for my Son
When I made this one I couldn't find any cute patterns that were intended
for a baby. I ended up finding this one and improvising it.
I left out birds where the lettering is and had to
use the text from an old pattern.


Cross-Stitch I made for my Daughter
this was the easiest pattern I've done so far.
Although easy it was alot of fun.


Closer view
I am currently in the process of making one for my youngest son.
I will post more about it as it progresses. 

Getting Acquainted

Well this is my first post, so I figured I’d use this time to acquaint everyone with what I’m doing here. Basically I will be sharing things that surround raising a faimly. So it may vary quite a bit at times, I will spend more time on topics that others add input to or are interested in. I will also add links to products that I feel are very helpful and things that I would like to have. I intend on sharing things from all over the spectrum such as - Clothing (style) – Home Decor & Space Management - Crafts & DIY - Meal, Snack & Drink ideas - Money ManagementWeight Management - Quirky things kids say & do - Child Rearing & ways to help Manage Behavior Problems. You can also follow me on pinterest - shakenwillow81, twitter - shakenwillow81 or facebook - adrianne.fisher.3.